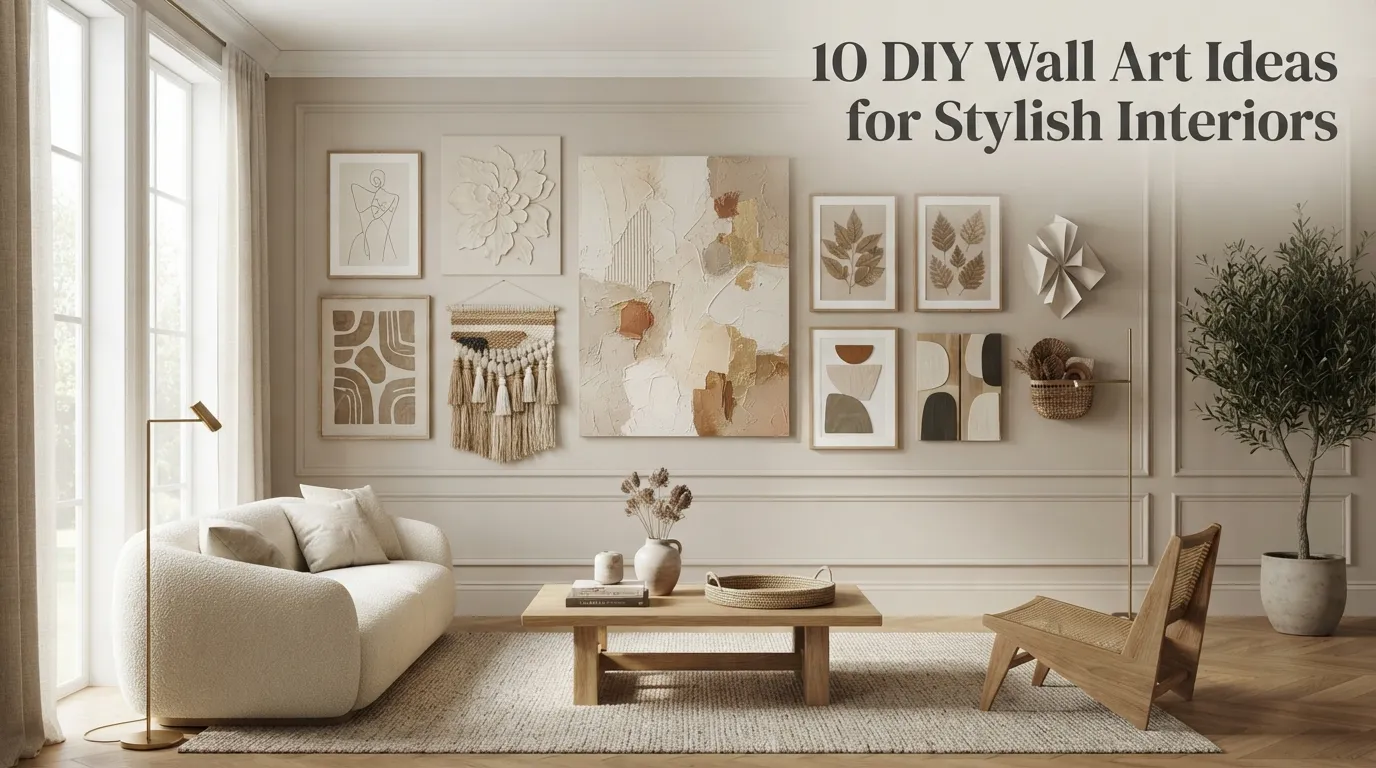
10 DIY Wall Art Ideas for Stylish Interiors
Blank walls can make an otherwise beautiful room feel unfinished. Furniture may be thoughtfully arranged, the lighting may be warm, and the color palette may feel cohesive, yet an empty wall can still leave the space looking a little flat.
DIY wall art offers an easy way to solve that problem while adding something more personal than mass-produced decor. The best projects do not require an art degree or a room full of specialized tools. Many can be made with simple materials, leftover paint, fabric, paper, wood, or objects you already have at home.
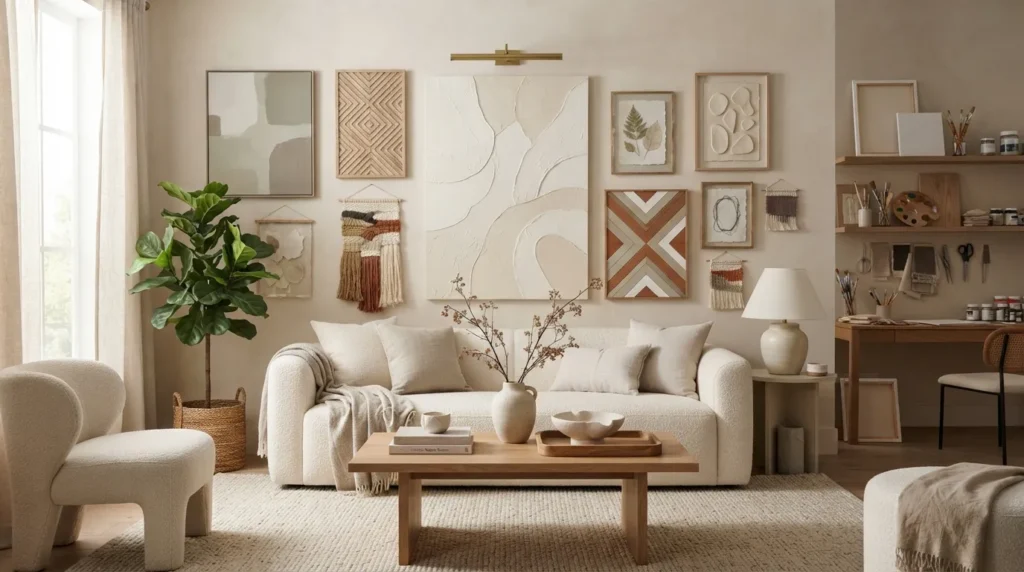
The key is choosing a project that works with the room rather than simply filling an empty space. A large abstract canvas can create a strong focal point above a sofa. Textured fabric can soften a bedroom wall. Simple wooden panels can bring warmth to a modern dining area. Even an arrangement of inexpensive frames can look polished when the spacing and color palette are intentional.
In my experience, the most successful DIY wall art projects usually have one thing in common: they look considered rather than overly complicated. You do not need dozens of colors or elaborate patterns to create something impressive. A restrained palette, interesting texture, and properly sized artwork can have a much stronger effect.
DIY art is also useful when decorating on a budget. Instead of searching for one large piece that fits your exact wall, you can create something specifically for the space. You control the size, colors, materials, and overall mood.
These ideas work across living rooms, bedrooms, hallways, dining rooms, home offices, and entryways. Some are beginner-friendly, while others offer more room for experimentation.
If your walls are ready for a refresh, these DIY wall art ideas can help you create stylish interiors that feel personal, layered, and finished.
Table of Contents
1. Oversized Abstract Canvas
Create a large statement piece with simple shapes, layered tones, and expressive brushwork.
2. Textured Fabric Panels
Use fabric and simple framing techniques to add softness and dimension to blank walls.
3. Painted Wood Panels
Combine natural wood with simple painted designs for warm architectural interest.
4. Minimal Line Art
Create understated artwork with simple continuous lines and a restrained color palette.
5. Botanical Gallery Wall
Turn pressed leaves, botanical prints, or plant silhouettes into a coordinated wall display.
6. Geometric Paint Blocks
Use painter’s tape and carefully selected colors to create crisp modern compositions.
7. Framed Fabric Art
Transform beautiful textiles into affordable artwork with a simple frame.
8. DIY Plaster Artwork
Create dimensional abstract pieces with plaster-like texture and neutral tones.
9. Vintage Frame Collection
Combine thrifted or secondhand frames into a collected arrangement with personality.
10. Layered Paper Artwork
Build depth with paper shapes, shadows, and overlapping forms for a modern handmade look.
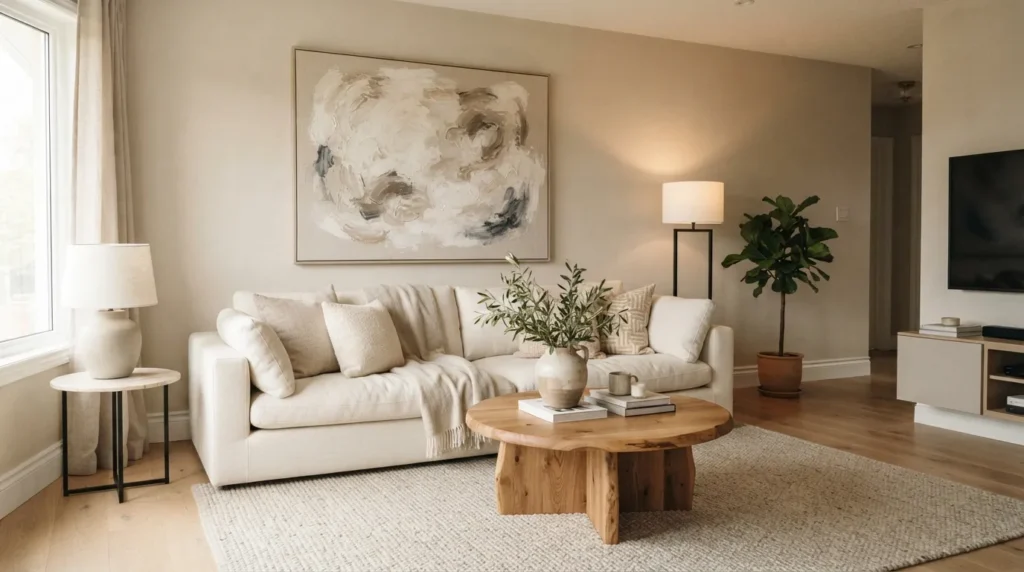
1. Oversized Abstract Canvas
Quick Benefits
- Creates an immediate focal point
- Works above sofas and beds
- Allows complete color customization
- Can be made with inexpensive supplies
- Makes a large wall feel finished
Why It Works
An oversized canvas can change the proportions of a room surprisingly quickly. Large walls often look better with one substantial piece than with several small decorations scattered across the surface.
Abstract artwork is particularly useful for DIY projects because it does not require you to reproduce a recognizable image. Shapes, brushstrokes, color fields, and texture can create an expressive composition without demanding perfect technique.
The easiest way to make the artwork look sophisticated is to limit the palette. Choose two or three dominant colors that already appear in the room. For example, a neutral living room might use ivory, warm beige, taupe, and a small amount of charcoal.
Scale is equally important. Above a sofa, the artwork generally looks more balanced when it relates to the width of the furniture rather than appearing like a small isolated object.
How To Style It
Start with a large stretched canvas or an inexpensive blank canvas.
Choose a base color that complements the room. Warm white, cream, beige, or soft gray can create a versatile background.
Sketch the composition lightly before adding paint. Think about broad areas rather than tiny details.
Use a large brush for loose shapes and a smaller brush for occasional definition. A palette knife can create interesting texture if desired.
Allow each layer to dry before adding another. This prevents the colors from becoming muddy.
Hang the finished piece above a sofa, console, bed, or dining sideboard.
For a polished appearance, repeat one or two artwork colors elsewhere in the room through cushions, ceramics, rugs, or accessories.
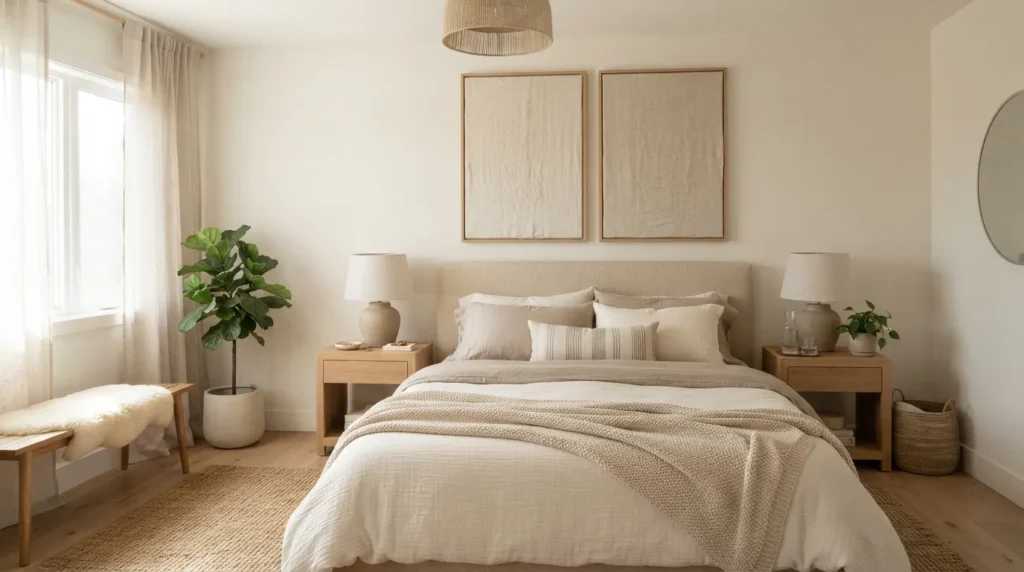
2. Textured Fabric Panels
Quick Benefits
- Adds softness to hard surfaces
- Introduces pattern without paint
- Works well in bedrooms
- Requires minimal artistic skill
- Can be customized to any room
Why It Works
Fabric brings a different kind of texture to a wall. Unlike painted artwork, it can add softness, visible fibers, subtle pattern, and warmth.
This idea is particularly useful in bedrooms and calm living spaces where you want the walls to feel inviting rather than overly graphic.
A beautiful textile can become artwork simply by stretching it over a frame or mounting it inside a large frame. Linen, cotton, woven fabric, block-printed textiles, and vintage-inspired patterns can all work.
The most important consideration is scale. A small piece of fabric can disappear on a large wall, while one large textile can become a sophisticated focal point.
How To Style It
Choose fabric that contains colors already present in the room.
For a neutral interior, consider cream, oatmeal, beige, faded blue, muted green, or warm brown.
Stretch the fabric tightly over a lightweight wooden frame or mounting surface. Keep the edges neat and secure the fabric from behind.
Another option is placing the textile inside a deep frame so the edges remain protected.
Hang one large panel above a bed or sofa, or create a pair of matching panels for symmetry.
Keep the surrounding decor relatively simple. The texture of the fabric can provide enough visual interest on its own.
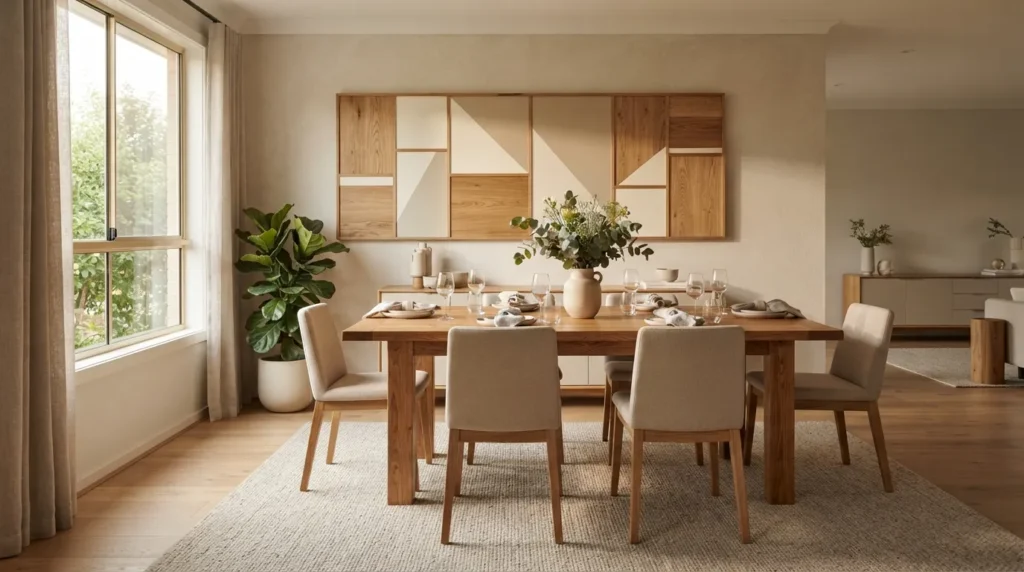
3. Painted Wood Panels
Quick Benefits
- Adds natural warmth
- Creates architectural interest
- Works with modern interiors
- Can cover large walls
- Combines texture and color
Why It Works
Wood and paint create an appealing contrast. The natural grain provides warmth, while painted sections introduce color and structure.
This project works particularly well when a room contains many hard, smooth surfaces. Wood can soften the visual appearance of contemporary furniture and neutral walls.
You can keep the design extremely simple. A few vertical panels with alternating natural and painted sections can create a subtle architectural effect. Another approach is arranging smaller wood boards into a geometric composition.
The project can also be adapted to different styles. Natural oak and cream work beautifully in warm minimalist rooms, while darker wood with charcoal or muted green can create a moodier look.
How To Style It
Use lightweight wood panels or boards that are easy to handle.
Sand the surfaces before painting and remove dust thoroughly.
Choose a paint color that connects with the existing room palette.
You can paint entire boards, create simple arches, add thin stripes, or use geometric blocks.
Leave some sections natural if you want the grain to remain visible.
Arrange the panels on the floor first. Experiment with spacing until the composition feels balanced.
Secure the finished pieces properly according to their weight and the type of wall.
This idea works especially well behind a dining table, in a home office, or above a low console.
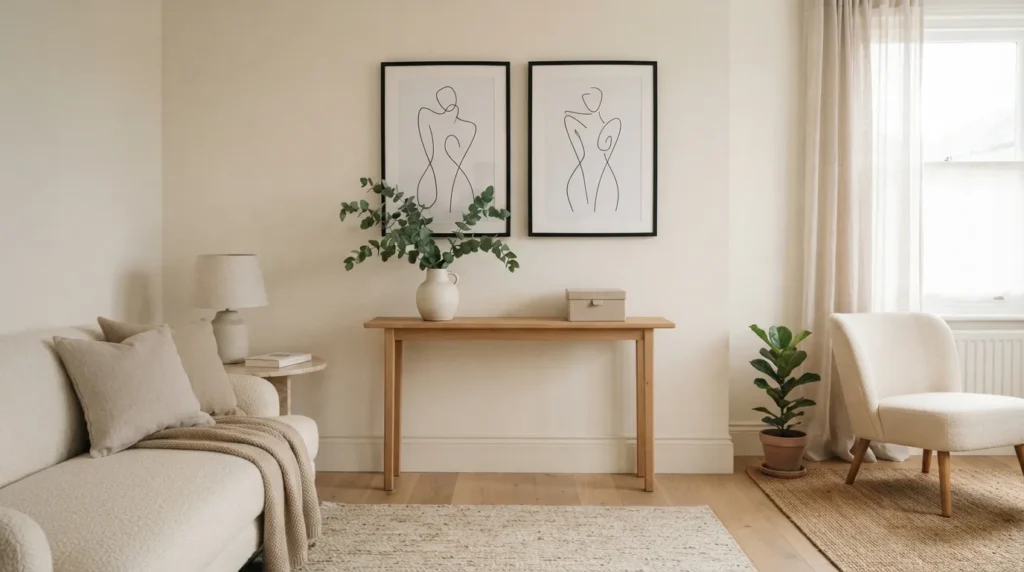
4. Minimal Line Art
Quick Benefits
- Creates an understated focal point
- Works with modern decor
- Requires few materials
- Fits small spaces
- Easy to customize
Why It Works
Simple line art can bring personality to a room without overwhelming the rest of the decor.
The appeal comes from restraint. A single continuous line forming an abstract face, botanical shape, figure, or organic form can look remarkably sophisticated when paired with a generous amount of negative space.
This project is also approachable for beginners. The goal is not perfect realism. Slight imperfections can make handmade artwork feel more personal.
Black lines on warm white paper are classic, but there is plenty of room for variation. Charcoal, dark brown, muted terracotta, or deep olive can create softer alternatives.
How To Style It
Choose heavyweight art paper or watercolor paper.
Practice the composition on scrap paper before working on the final piece.
Use a fine black pen, brush pen, charcoal pencil, or diluted paint depending on the effect you want.
Keep the design relatively simple.
For a sophisticated gallery effect, create two or three related drawings rather than making every piece completely different.
Use simple frames in natural wood, black, white, or warm metal.
A pair of line-art prints can work beautifully above a nightstand, hallway console, or small desk.
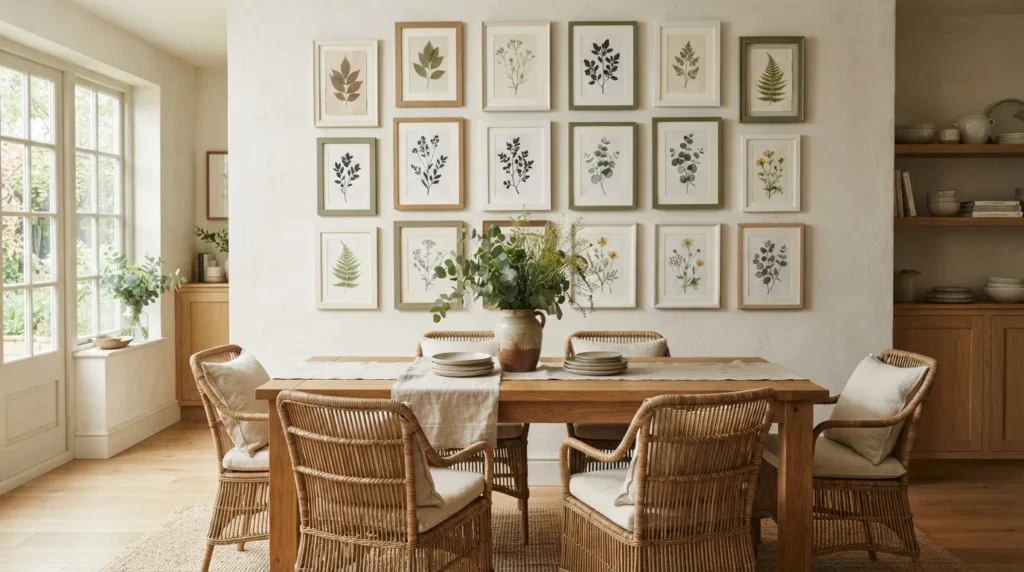
5. Botanical Gallery Wall
Quick Benefits
- Brings natural elements indoors
- Creates a collected appearance
- Works in many decorating styles
- Can use inexpensive materials
- Provides flexible arrangement options
Why It Works
Botanical artwork adds an organic quality to interiors. Leaves, branches, flowers, and plant silhouettes can bring subtle color and movement to otherwise neutral walls.
A gallery wall also gives you more flexibility than a single large artwork. You can gradually add pieces as you find them, making the collection feel collected rather than purchased all at once.
DIY botanical art can take several forms. You can press leaves, create simple plant silhouettes, photograph greenery, paint botanical shapes, or arrange dried stems inside shadow boxes.
The strongest collections usually have some consistency. Repeating frame colors or maintaining a similar palette helps the wall feel intentional.
How To Style It
Choose a theme before collecting pieces. You might focus on leaves, herbs, wildflowers, branches, or simple botanical silhouettes.
Use frames in one or two finishes.
For a traditional appearance, combine several frame sizes. For a more contemporary gallery, use identical frames in a neat grid.
Place the pieces on the floor and photograph the arrangement before hanging.
Leave consistent spacing between frames.
Use white, cream, pale green, muted brown, or soft gray backgrounds to keep the display calm.
This idea works particularly well in dining rooms, hallways, bedrooms, and home offices.
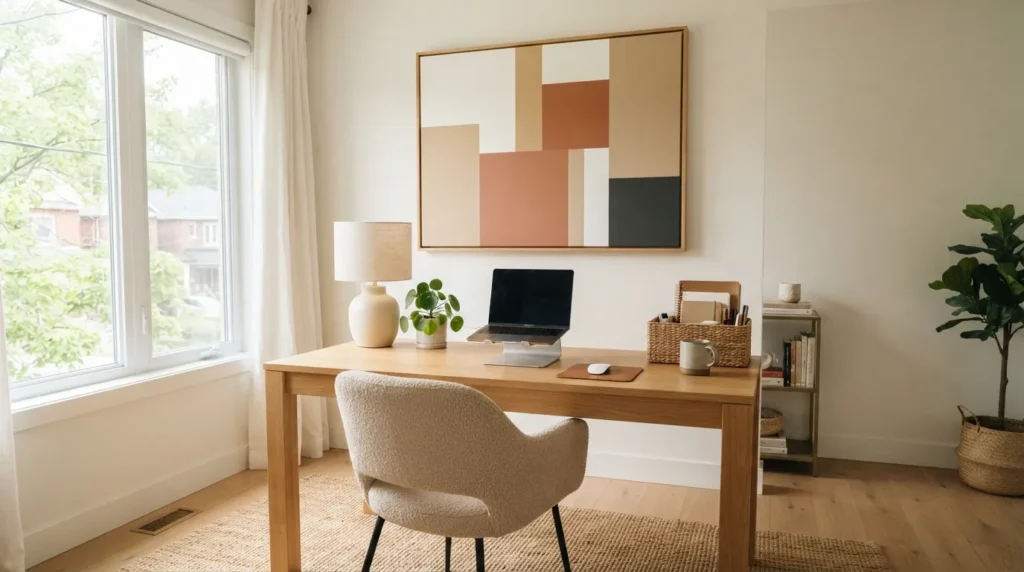
6. Geometric Paint Blocks
Quick Benefits
- Creates a modern focal point
- Uses inexpensive supplies
- Allows precise color customization
- Works well in contemporary spaces
- Can be adapted to different wall sizes
Why It Works
Geometric artwork creates structure through simple shapes. Rectangles, arches, circles, stripes, and blocks of color can turn a blank canvas into something graphic and modern.
Painter’s tape makes this project accessible even if you are not confident with freehand painting. The tape creates clean edges and allows you to build a composition gradually.
Color selection is the most important design decision. Instead of choosing random shades, pull colors from the room.
A neutral living room might use warm white, sand, clay, and charcoal. A bedroom might use cream, dusty blue, muted green, and taupe.
How To Style It
Begin with a clean canvas or a smooth painted board.
Plan your shapes on paper first.
Use a ruler and pencil to mark the layout.
Apply painter’s tape carefully along the edges.
Paint each section and allow it to dry before removing the tape.
If layering colors, let the first sections dry fully before taping over them.
Frame the finished piece if desired.
For a large wall, create three related panels rather than one extremely complex composition. Repeating the same colors across all three pieces creates cohesion.
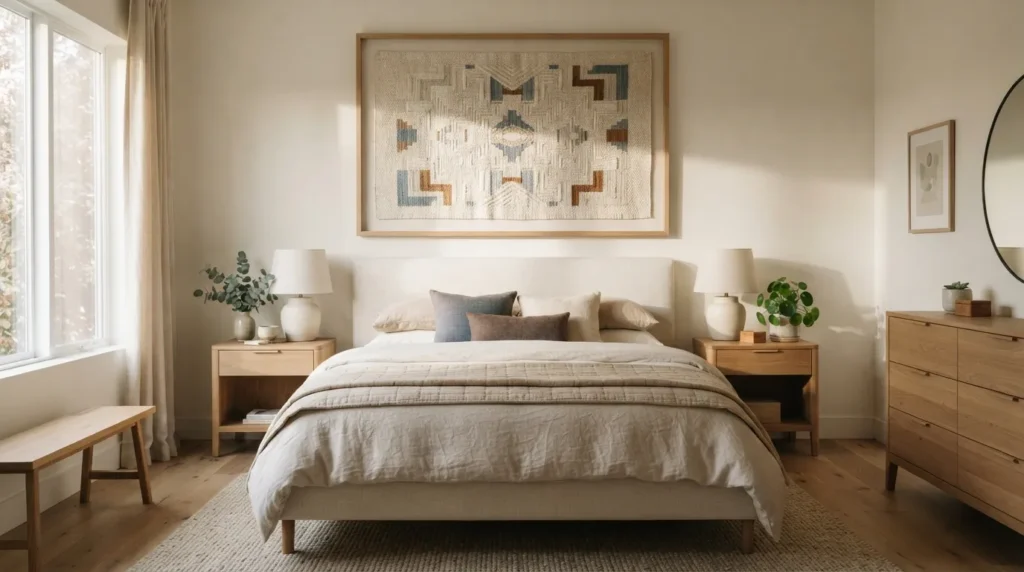
7. Framed Fabric Art
Quick Benefits
- Turns textiles into artwork
- Adds color and texture
- Works with vintage materials
- Can be inexpensive
- Requires little artistic skill
Why It Works
Some fabrics are beautiful enough to deserve a place on the wall. Framing them turns a practical textile into a decorative feature while preserving its pattern and texture.
This idea is particularly useful if you have a piece of fabric you love but do not have an obvious way to use it elsewhere.
Vintage textiles, scarves, embroidered fabrics, block prints, woven pieces, and remnants can all become artwork.
The frame adds structure and gives the textile a finished appearance.
How To Style It
Choose a textile that works with the room’s color palette.
For a modern interior, select a fabric with a simple geometric or abstract pattern.
For a more traditional space, embroidery, floral motifs, or vintage-inspired textiles can work beautifully.
Mount the fabric flat and smooth.
Use a frame with enough depth to accommodate the textile without crushing its texture.
Natural wood works well for warm interiors, while black frames create stronger contrast.
One large textile can become a focal point above a console or sofa. Smaller framed pieces can be arranged as a gallery.
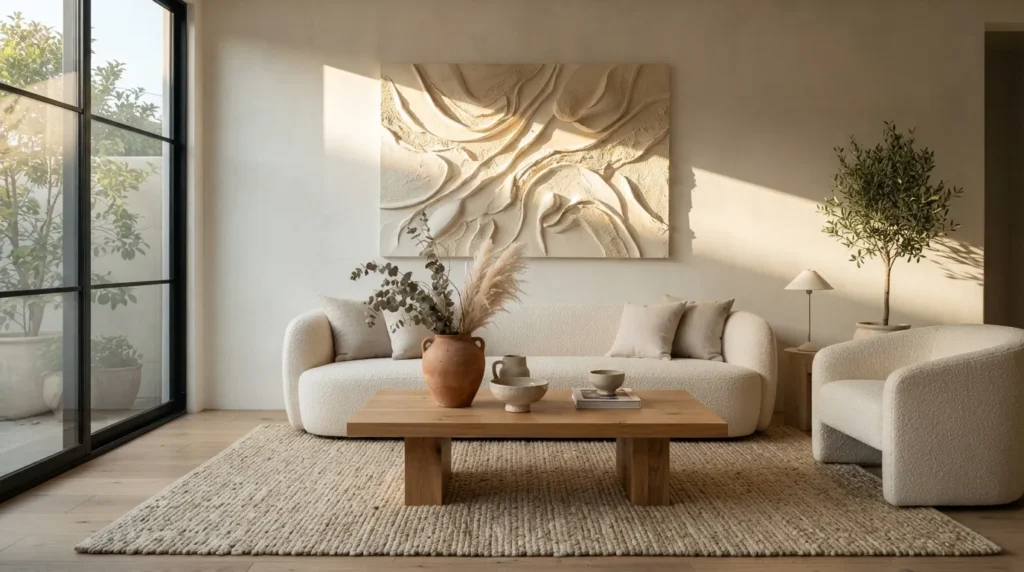
8. DIY Plaster Artwork
Quick Benefits
- Adds three-dimensional texture
- Creates a contemporary appearance
- Works beautifully with neutral interiors
- Can be customized
- Makes simple compositions more interesting
Why It Works
Textured artwork adds dimension that flat paint cannot provide. Plaster-like surfaces create shadows and highlights as natural light moves across the piece.
This style works particularly well in modern, minimalist, organic, and neutral interiors.
The design can be abstract and simple. Sweeping curves, raised lines, arches, waves, and irregular shapes can create movement without requiring complicated imagery.
Neutral colors are especially effective because the texture becomes the primary feature.
If using actual plaster, joint compound, modeling paste, or another material, follow the manufacturer’s instructions and choose a suitable surface for the medium.
How To Style It
Start with a sturdy canvas or appropriate art board.
Create a simple design using a palette knife or suitable tool.
Apply the material gradually rather than creating extremely thick layers in one application.
Allow the artwork to dry completely.
You can leave the surface natural or paint it in warm white, cream, beige, or another neutral shade.
Place the artwork where natural or directional light can reveal the texture.
A simple wooden frame can add warmth around the textured surface.
This project looks especially effective above a console, bed, fireplace, or minimalist sofa.
9. Vintage Frame Collection
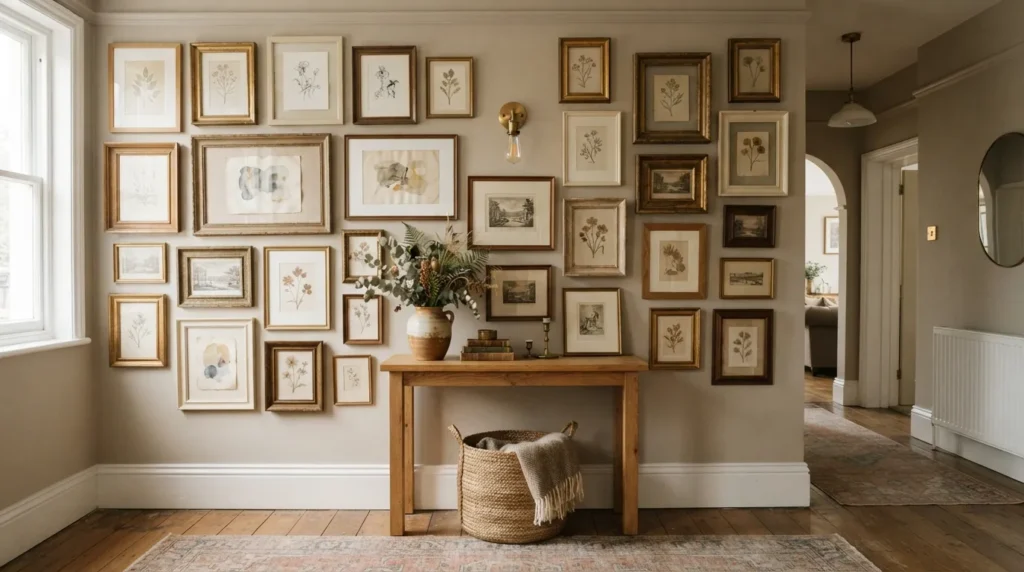
Quick Benefits
- Adds character without expensive artwork
- Creates a collected look
- Works with photographs and prints
- Allows gradual expansion
- Gives empty walls personality
Why It Works
A wall does not need expensive artwork to feel sophisticated. Sometimes the frames themselves provide much of the visual interest.
Secondhand and thrifted frames can offer details that are difficult to reproduce in new pieces. Different profiles, subtle wear, carved edges, and aged finishes can create a sense of history.
The trick is creating enough consistency so the collection feels intentional.
You can unify different frames through color, subject matter, or matting.
A collection of empty frames can also work as sculptural wall decor, although using actual artwork, photography, or paper pieces gives the display additional meaning.
How To Style It
Collect frames in several sizes.
Look for natural wood, black, cream, brass-toned, or aged finishes.
Do not worry if every frame matches perfectly.
Choose a visual connection, such as similar artwork colors or repeated white matting.
Arrange the largest frame first and build outward.
For a relaxed appearance, vary the spacing slightly while maintaining overall balance.
For a more formal gallery, use a grid with consistent spacing.
This idea works beautifully along stairways, dining room walls, hallways, and living room feature walls.
10. Layered Paper Artwork
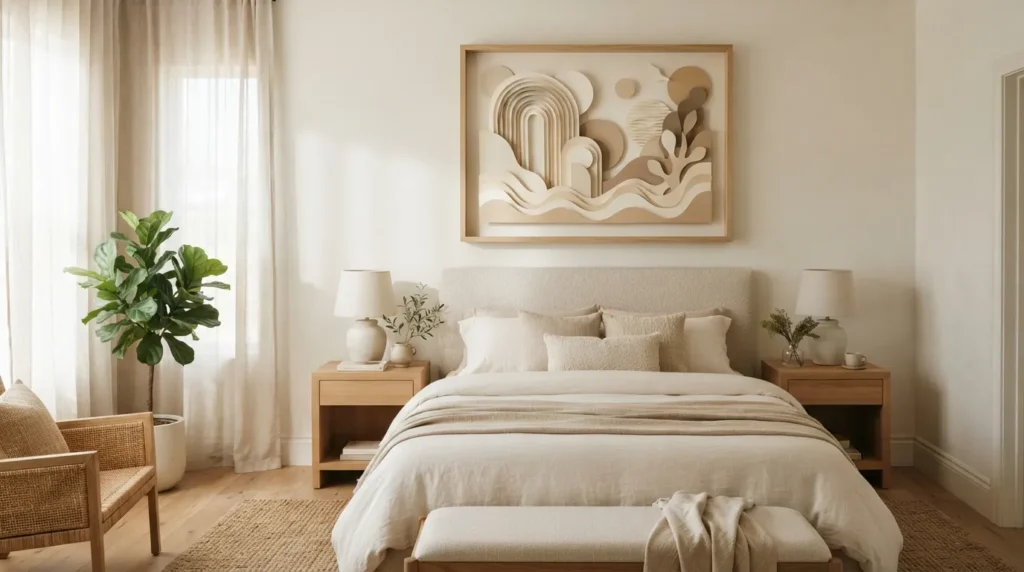
Quick Benefits
- Requires inexpensive materials
- Creates dimensional detail
- Works in modern interiors
- Offers endless color combinations
- Easy to make in different sizes
Why It Works
Paper can become surprisingly sophisticated when it is layered rather than simply placed inside a frame.
Cut circles, arches, organic shapes, waves, leaves, or geometric forms from heavyweight paper and arrange them at different depths. Small spacers can create shadows between layers, giving the artwork a sculptural appearance.
This technique works particularly well with neutral palettes because the shadows provide much of the visual interest.
It is also an excellent project when you want to coordinate artwork precisely with your room.
How To Style It
Choose heavyweight cardstock or quality art paper.
Select three to five colors that complement the interior.
Cut shapes by hand or with a precision cutting tool.
Arrange the pieces on a flat surface before attaching them.
Use small spacers behind selected pieces to create depth.
Place the finished composition inside a deep frame if the layers extend away from the backing.
Try warm white, beige, tan, clay, and muted brown for an organic look, or use black, white, gray, and one accent color for a more contemporary effect.
How To Choose DIY Wall Art For Your Room
The best DIY artwork begins with the room rather than the craft project.
Look at the furniture, flooring, textiles, and existing accessories. Identify two or three colors that already appear in the space. Those colors can become the starting point for your artwork.
Then consider scale.
A large blank wall above a sofa usually needs substantial visual weight. One oversized canvas or several large panels may work better than a collection of tiny frames.
A narrow hallway has different requirements. Small framed pieces or a vertical arrangement can suit the proportions more naturally.
Also consider the mood. Soft neutrals and organic shapes create a calm feeling. Strong geometric forms and contrasting colors feel more energetic.
The goal is not simply to make something attractive. The goal is to make something that belongs in the room.
How To Make DIY Art Look Expensive
You do not need expensive materials to create sophisticated artwork.
Start with a restrained color palette. Too many unrelated colors can make handmade pieces feel chaotic.
Pay attention to scale. Large artwork that suits the wall often looks more intentional than several undersized pieces.
Use quality-looking frames. A simple natural wood or black frame can elevate inexpensive artwork.
Create negative space. Let parts of the composition breathe.
Repeat colors. If your artwork uses muted green, repeat that shade in a plant pot or cushion.
Avoid overdecorating. One strong handmade piece often has more impact than several unrelated DIY projects.
Good presentation can be just as important as the artwork itself.
DIY Wall Art Ideas For A Small Apartment
Small homes benefit from artwork that adds personality without consuming floor space.
A framed fabric panel can introduce texture without making a room feel crowded. Minimal line art works well above narrow consoles or desks. A small botanical gallery can add interest to a hallway.
If you are renting, consider lightweight artwork and hanging methods appropriate for your lease and wall type.
Vertical arrangements can make a narrow room feel taller, while a wider horizontal composition can visually connect furniture.
Mirroring colors from your existing textiles is another simple way to make DIY artwork feel integrated.
A small home does not require less personality. It simply benefits from more intentional scale.
DIY Wall Art For Living Rooms
The living room is often the best place for a larger statement piece.
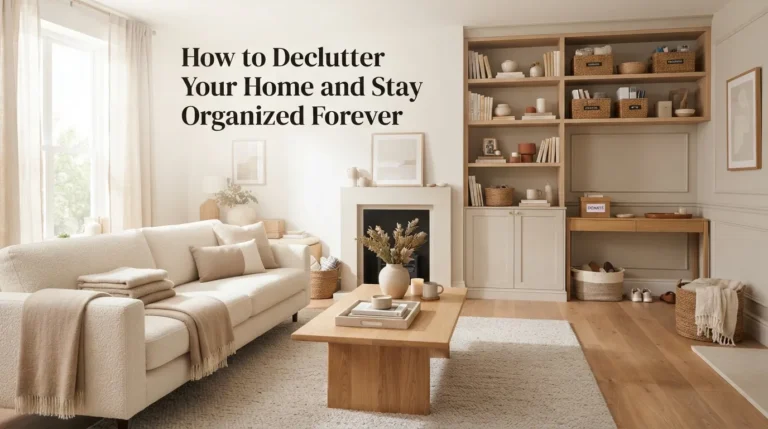
An oversized abstract canvas above the sofa can establish the room’s color palette. Textured plaster artwork can complement a modern neutral space. A vintage frame collection can work beautifully in a traditional or eclectic interior.
Keep the artwork related to the furniture beneath it.
A large sofa generally needs artwork with enough width to visually connect the two. Several smaller pieces can also create a unified horizontal arrangement.
If your living room already contains patterned rugs or colorful cushions, consider keeping the wall art relatively restrained.
If the furniture is simple, the artwork can provide more visual personality.
DIY Wall Art For Bedrooms
Bedroom artwork works best when it supports a restful atmosphere.
Soft colors, organic shapes, botanical designs, textured fabric, and minimalist line drawings are easy choices.
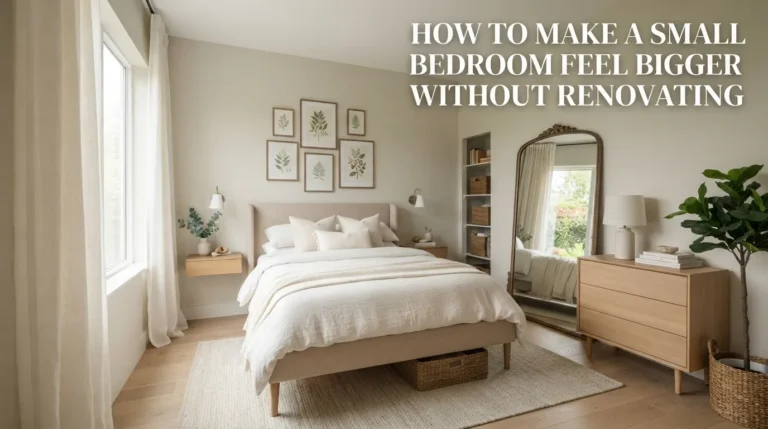
A pair of matching pieces above bedside tables can create symmetry. One large textured piece above the headboard can provide a simple focal point.
Avoid placing heavy or poorly secured objects where they could become a safety concern.
For a cozy look, combine artwork with soft lighting, natural textiles, warm wood, and subtle colors.
The bedroom does not need a complicated gallery wall to feel finished.
DIY Wall Art For Entryways
The entryway is a small area with a big opportunity.
A framed botanical print above a console can immediately add personality. A small collection of vintage frames can create an inviting collected appearance.
If the entryway is narrow, consider vertical artwork or a tall arrangement.
A mirror can also be incorporated alongside handmade art to provide practical function.
Use durable frames and keep delicate artwork away from areas where bags, coats, or daily traffic could damage it.
The goal is to create a welcoming first impression without obstructing movement.
Common DIY Wall Art Mistakes
One of the most common mistakes is choosing artwork that is too small for the wall. A beautiful piece can still look disconnected when its scale is wrong.
Another mistake is using too many unrelated colors. DIY projects become much easier to integrate when the palette connects with the rest of the room.
Hanging artwork too high can also make furniture arrangements feel disconnected. Consider the relationship between the artwork, nearby furniture, and eye level.
Avoid rushing the finishing stage. Uneven edges, visible pencil marks, loose fabric, or poorly finished frames can make an otherwise good project look unfinished.
Finally, do not assume complicated means stylish. Simple compositions often have the strongest visual impact.
FAQ
What is the easiest DIY wall art for beginners?
Minimal line art, framed fabric, simple abstract canvases, and botanical artwork are among the easiest options. They require relatively few materials and do not depend on advanced artistic skills. Start with a restrained color palette and a simple composition to make the project easier to control.
How can I make DIY wall art look professional?
Focus on scale, composition, color, and presentation. Use a limited palette, keep the design balanced, finish edges carefully, and choose a frame that complements the artwork. Proper spacing and placement can also make inexpensive handmade art look considerably more polished.
What can I use for DIY wall art?
Many everyday materials can become wall art, including canvas, paper, fabric, wood, paint, dried leaves, photographs, ceramic pieces, and textured modeling materials. The best material depends on the style of your room and the amount of dimension you want.
How large should DIY artwork be above a sofa?
The artwork or overall arrangement generally looks more balanced when it relates to the width of the sofa rather than being dramatically narrower. A large canvas or several coordinated pieces can create a stronger visual connection than a small isolated frame.
How do I choose colors for DIY wall art?
Look at colors already present in your room. Pull one or two shades from the rug, curtains, cushions, furniture, or accessories and combine them with neutrals. This makes handmade artwork feel connected to the existing interior instead of looking like a separate decorative object.
Is DIY wall art good for rental homes?
Yes. Lightweight framed art, fabric pieces, paper artwork, and small gallery arrangements can work well in rental spaces. Always use hanging methods appropriate for the wall surface and follow your lease requirements. Artwork can add substantial personality without permanent renovations.
How do I arrange several pieces of DIY artwork?
Start by placing the pieces on the floor and experimenting with the arrangement. Begin with the largest piece and build around it. Keep the overall shape balanced and maintain enough negative space between frames. A consistent frame color or shared artwork palette can help different pieces feel like one collection.
Conclusion
DIY wall art is one of the simplest ways to make an interior feel more personal. Instead of searching endlessly for artwork that happens to fit your wall, you can create pieces specifically for your home.
The most stylish results usually come from simple ideas executed carefully. An oversized abstract canvas can establish a room’s color palette. Fabric can bring softness and texture. Wood can introduce warmth. Line art can keep a modern space understated. Botanical pieces can connect the room with nature.
Before starting a project, look at the room as a whole. Consider its colors, proportions, textures, and existing furniture. Then choose an art style that adds something the space currently lacks.
You also do not have to complete everything in one weekend. Start with one blank wall and one project. Live with it for a while and see how it changes the room.
A handmade piece does more than fill an empty wall. It can reflect your taste, make a space feel finished, and give an ordinary room a detail that feels uniquely yours.
Related Articles
- 10 DIY Wall Art Ideas Using Budget-Friendly Supplies
- 10 Modern Living Room Ideas with Timeless Elegance
- 10 Bedroom Wall Decor Ideas That Add Elegant Texture
- 10 DIY Home Decor Projects for Stylish Interiors
- 10 Modern Neutral Aesthetic Bedroom Ideas